How to Use Custom User Agents with Extract APIs
When a website becomes very popular, it can draw the attention of many scraping bots from around the web. Diffbot is one such bot. A site being swarmed by such bots may opt to ban automated visitors altogether which isn't ideal for Diffbot's customers. In those cases, it is best to speak with the website's owners, assure them of noble intentions, and get them to whitelist a custom User-Agent string so that Diffbot can pass through.
But what if they don't want all Diffbot customers to crawl them, only you, their favorite customer? You can get as specific as you want with User-Agents.
Setting a Custom User-Agent
Let's suppose that you agreed with the target website to whitelist the word "pineapple". In other words, any User-Agent containing the word "pineapple" will be allowed through, but any User-Agent without it will be blocked by the target website entirely. How do we add "pineapple" to our User-Agent string permanently?
The following two approaches apply.
Via Dashboard
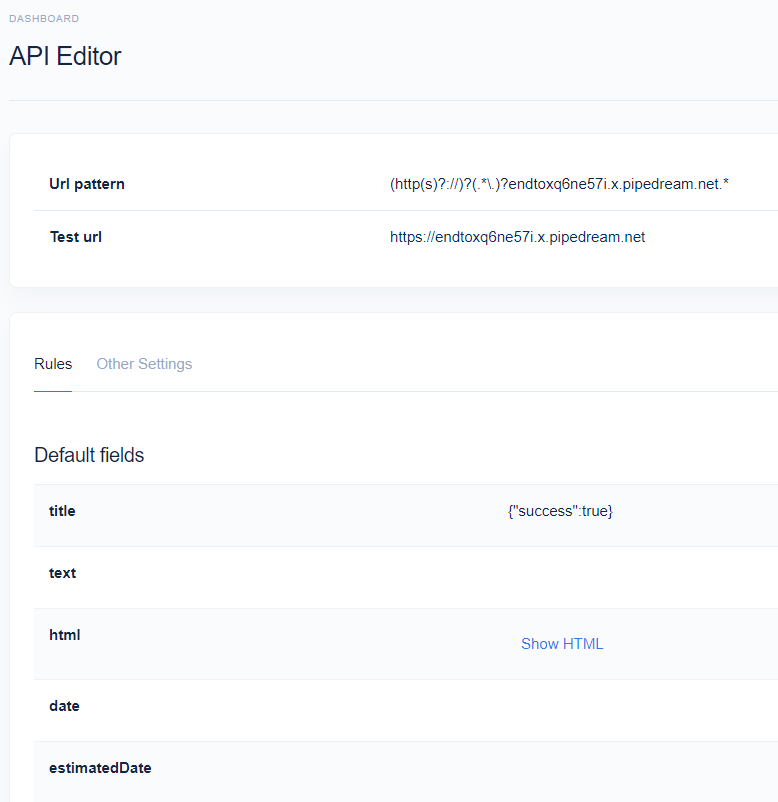
For testing purposes, let's set up a RequestBin. RequestBin allows you to inspect requests coming in so you can see which headers have been applied. We're interested in the User-Agent header. Go ahead and set up a RequestBin. Once you have your unique URL, go to the Custom API section in the new dashboard and enter the unique requestbin URL, then click Create. You should see something like this in Diffbot:

And the RequestBin UI should give you the following header information:

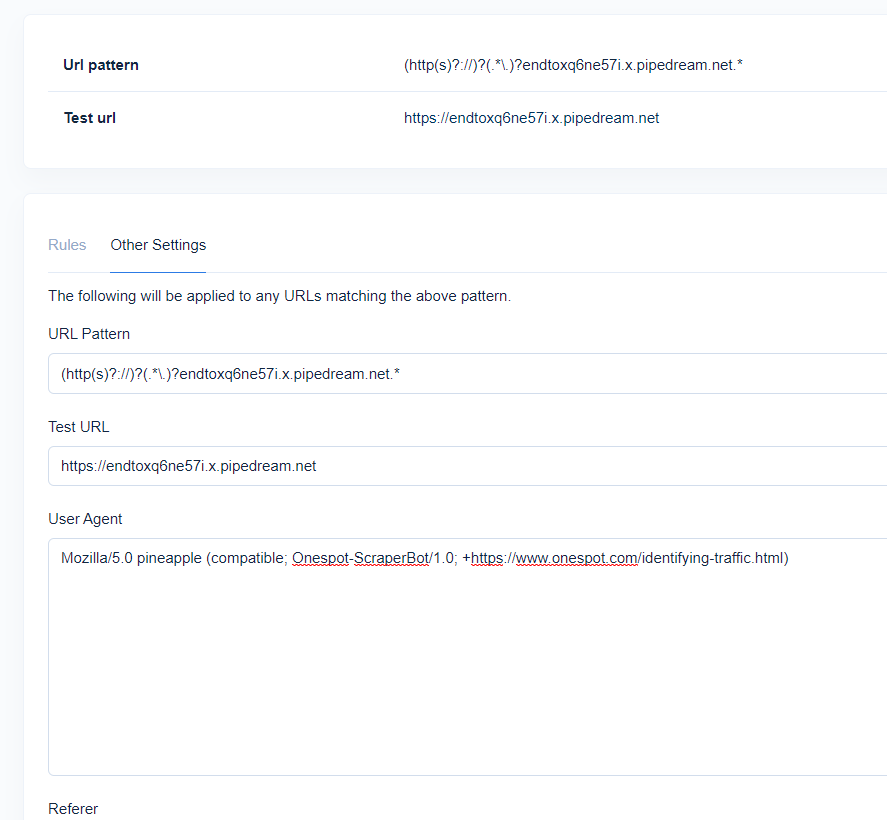
You'll notice we have Mozilla/5.0 (compatible; Onespot-ScraperBot/1.0; +https://www.onespot.com/identifying-traffic.html) as the current UA. Now let's go into the Other Settings tab in Diffbot's custom API UI and add a new User-Agent. Once we click Save, the rule will reload and re-issue the request towards RequestBin. That's all there is to it - the header values should show "pineapple" now.

Repeat the process for every domain for which you want a custom User-Agent!
Programmatically, via API
Similarly to the process on the Dashboard, we will create a Custom API with rules that extend our Article API to include a custom User-Agent.
To do this, we will be using the endpoint that Updates a Custom API.
We need to first construct a ruleset to update our Custom API with. This is what it will look like:
{
    "urlPattern": "(http(s)?://)?(.*\\.)?endtoxq6ne57i.x.pipedream.net.*",
    "xForwardHeaders": {
        "User-Agent": "Mozilla/5.0 pineapple (compatible; Onespot-ScraperBot/1.0; +https://www.onespot.com/identifying-traffic.html)"
    },
    "api": "/api/article",
    "testUrl": "https://endtoxq6ne57i.x.pipedream.net"
}
Finally, we will send this ruleset in the body of a POST request to https://api.diffbot.com/v3/custom?token=YOURTOKEN. Here's what it looks like as a cURL:
curl --location --request POST 'https://api.diffbot.com/v3/custom?token=YOURTOKEN' \
--header 'Content-Type: application/json' \
--data-raw '{
    "urlPattern": "(http(s)?://)?(.*\\.)?endtoxq6ne57i.x.pipedream.net.*",
    "xForwardHeaders": {
        "User-Agent": "Mozilla/5.0 pineapple (compatible; Onespot-ScraperBot/1.0; +https://www.onespot.com/identifying-traffic.html)"
    },
    "api": "/api/article",
    "testUrl": "https://endtoxq6ne57i.x.pipedream.net"
}'
Note: Remember to modify the domain of the url pattern to match your target website's!
The response to this request will contain a hash that can be used to update this rule directly with the same endpoint.
Keep in mind that if an existing Custom API has already been created with the same urlPattern and api values, this request will completely override your existing Custom API. Otherwise, it will simply create a new Custom API.
Updated 3 months ago